Showing posts with label cooking. Show all posts

Thursday, September 10, 2009

Today's Kool Idea: Utensil Pot Clip by Trudeau

Cooking is a very popular but messy affair in The Daily Kool household. We tend to favor many one-pot wonders for our meals, like soups (especially from our Daily Soup Cookbook) and stews. Most of our dishes require lots of loving attention, and yes, plenty of stirring. There's only one problem. For some strange reason, we have always had an aversion to using a spoon rest. We hate the thing...who knows why. Just chalk it up to one of many, many little quirks that our psychologist would have a field day with...yep, we've definitely been avoiding him these days. Anyway, we usually just settle for setting our stirring utensils right there on the stovetop, cringing at the mess, but resigning ourselves to just dealing with it later. Okay, so we're a little strange.

Did you ever get one of those goofy little kitchen gadgets that you suspected doubted would ever rise above the bottomless pit of your junk drawer? We admit it, we were convinced the utensil pot clip by Trudeau completely fell into that category...until we used it for the first time, that is. It's colorful, it's cute and it's one of the "koolest" kitchen gizmos we've come across since um, the widget or something. Who knew this little guy could become so indispensable? Designed to clamp securely to the side of most saucepans and stockpots, the
utensil pot clip features an arced slot to hold the handle of a spoon, turner or ladle. It is heat-resistant up to 600 degrees and prevents drips on the stovetop, keeps utensils handy and eliminates the need for that darn spoon rest.

Trudeau's
utensil pot clip is such a simple, yet innovative solution to a common problem...we're just steamed that we didn't think of it first! We have a couple and we really use them all the time, especially when we've got a crowd coming for a big meal. Keep in mind that unless you find them at your local Bed Bath & Beyond or other kitchen store, the company selects the colors at random so you won't likely get your preference. Our pots are black, so it didn't make a difference to us. Also, though we've never, ever had this problem, we did come across one person who complained that the silicone bumpers kept coming off in the pot. Nouvelle cuisine, perhaps? Anyway, there's a whopping five-year warranty on this $7 item, so if you ever have a problem, Trudeau will take care of it.

The
utensil pot clip by Trudeau is an absolute must-have for anyone who likes to cook, but dreads the traditional spoon rest. Okay, so it's great regardless of whether or not you have the same wacky pet peeves that we do here at The Daily Kool. It has truly become one of those practical, space-saving kitchen gadgets that we now wonder how we ever got along without. Easy to use, easy to clean and oh so convenient, the utensil pot clip has permanently found it's place of honor far, far away from our infamous junk drawer. Man, we really have to clean that thing out one of these days.


Bookmark and Share


Subscribe to The Daily Kool by Email

Wednesday, September 2, 2009

Today's Kool Idea: EZ Steam Grill Universal Steaming Insert

The Daily Kool has fallen in love again...with hot dogs! Hot dogs, you ask? We recently took a trip back to New York City and relived a tradition from our younger professional days. You guessed it. The "dirty" dog. You know what we're talking about. Those amazing hot dogs you get on the street corner for a couple of dollars...piping hot dog, freshly steamed buns and all the luscious toppings you can get on top. Getting hungry yet? There's just something about the "dirty" New York City water that makes those hot dogs taste absolutely amazing. We can't figure out what it is, but a "dirty" dog is an experience that everyone who visits the city should have. Your life will never be the same. We just wish we could recreate this hot dog nirvana at home.

Thanks to a local Atlanta inventor, now we can get pretty close. We came across
Chris Schutte on QVC last week, demonstrating his innovation, the EZ Steam Grill universal steaming insert. We were intrigued enough to go out and do a little more research. Frankly, the man himself is as inspiring as his invention. It seems that after becoming a victim of today's struggling economy in 2008, the suddenly unemployed father of two was able to turn adversity into profit with a dream fifteen years in the making. And it all started with a typical man's love for the stadium hot dog.

This two-piece combination set comes with two universal steaming inserts (6.5" and 8.75") that are adjustable to fit any medium to large pot to make a perfect hot dog in less than five minutes. Simply place the insert in the pot and boil some water. The "grill" rack design allows you to slip a couple of hot dogs into the water through the cross-shaped center opening to boil, place the buns on top of the EZ Steam Grill, cover and cook for a few minutes. That's all there is to it, folks.

Not ones to be impressed with a one dish wonder (no matter how addicting), it's nice to know that we can use the
EZ Steam Grill universal steaming insert to prepare a host of delicious meals besides the hot dog. Imagine the ease of preparing a yummy dish of steamed salmon, tender-crisp broccoli and fettuccine alfredo in a single pot. Or spice up some chicken and asparagus to steam and plate with already prepared brown rice. Love steamed lobster tails with melted butter? A little creativity is all it takes to get a beautiful and healthy meal with the EZ Steam Grill. We love how much versatility this product adds to our existing pots. Keep in mind though, this product does not seem to be designed to feed a larger family at once. Plan on cooking for about 2-3 people for the more complex meals, unless of course you use two pots and both inserts. Hot dogs only take a few minutes, so you could probably do a quick batch for a larger crowd, doing two or three at a time (per insert).

The
EZ Steam Grill universal steaming insert guarantees a perfect hot dog every time. Easy to use, reasonably priced (around $15 for the set of two) and oh, so convenient, this "kool" idea is the next best thing to having your very own New York or stadium hot dog vendor. Now, if we could only arrange to have the city's "dirty" water shipped to us regularly, our lives would be perfect...well, almost.


Bookmark and Share


Subscribe to The Daily Kool by Email

Tuesday, August 25, 2009

Today's Kool Idea: Done Right Multiple Cook Time Kitchen Timer

Fall is a busy time for The Daily Kool family. This is the time of year that we celebrate the season with large dinner parties. Oh, and we invite everyone! Ah, yes...food is definitely the catalyst that brings us all together. Always has been. It's nothing for us to expect 30-40 guests in our admittedly small home for an elaborate dinner. Over the past ten years of our marriage (yikes!), our household has truly become the destination for meals galore. We only have one rule...no one brings food. Bottles of wine? Sure. Soda? Absolutely. The food though, is our domain, and we always look forward to testing out new and exciting dishes on our more than willing company. Have we mentioned how much we love to cook?

We live for the moment when our guests marvel at the sheer genius of our culinary skills...not that it happens often. Okay, we admit it...we always mess a couple of things up with every dinner. We have so many dishes in various stages of preparation, cooking and plating, at least a few of them always fall through the cracks. Over-boiled soup, scorched veggies, mushy risotto and dry (we sometimes forget to baste) turkey are just a few examples of the disasters we've encountered over the years. It's not easy staying on top of everything all at once.

Thank goodness for our cousin. Last time she came over, she gave us this absolutely adorable Done Right multiple cook time kitchen timer as a hostess gift. Check it out...there are five (count them) separately functioning timers in one oven-shaped package. Each of the five timers gives off a sound flashes with a light when ready. This little guy is just what we need to stay on track! We love how we can correspond the stove top timers with each of our burners, while the front timer reminds us when to check the oven. We were actually amazed how easy the
Done Right timer was to program, even for us technically inept folks. Just press the 1 or 5 minute increment button until the desired time is reached and press start...it's that simple. Seriously, how great is this little gadget? And, why didn't we think of it first, darn it?

There are a couple of things that we've noticed with our own
Done Right multiple cook time kitchen timer that we wanted to pass along. First off, the alarm itself is fairly low, which is why they've added the flashing light component, we suppose. It would have been nice to have a volume adjustment option. Honestly though, it's not much (if at all) lower than our regular oven timer. Plus, one of us is always in the kitchen, so it's not particularly a problem for us. Also, we always use the company's suggestions for prolonging battery life. When we aren't cooking up a storm, we remove one of the four AA batteries, and usually make sure to stop the flashing light before its one-minute automatic shut off. You can find this kitchen timer at several websites, including Amazon, Target and Walmart. Our research though, shows that QVC seems to currently have the best price at just under $20 (plus shipping)...this the the main link we've provided throughout the post.

We love our
Done Right multiple cook time kitchen timer so much, we leave it out on our stove top, even when we're not using it. Sure, it's a little larger than your standard kitchen timer, but talk about a fabulous conversation piece. What a wonderful novelty gift for anyone who spends oodles of time in the kitchen...particularly those of us who need a little help with the orchestration and execution of our larger dinner parties. Form and function are definitely the right combination with this super "kool" idea. Of course, we've just eliminated our best (and most plausible) excuse for a not-so-perfect meal. Aargh...the pressure!


Bookmark and Share


Subscribe to The Daily Kool by Email

Tuesday, July 21, 2009

Today's Kool Idea: Lehman's Best Cherry Pitter

One of the most wonderful things about the summer is the abundance of fresh Bing cherries. Dark and sweet, this cherry is one of our all-time favorite fruits. We've been known to go through bushels of them in a sitting. Another funny story about our older brother growing up (we've told a few of them!)...our grandmother somehow convinced him that if he ever swallowed a pit, a real cherry tree would grow in his tummy. Talk about traumatizing a child...gotta love it, especially as a younger (and often tortured) sibling! Hence, our poor brother, though he loved them, hardly ever ate cherries for fear of what would happen...what a wuss!

Our children also love cherries, but have no qualms about recruiting us for cherry pit removal. So, being the ever loving parents that we are, we spend lots and lots of time sitting in front of the television hand-pitting cherries with our sharpest paring knife. Anyone who has kids can probably appreciate our misery. Dissecting cherries one at a time by hand is...well, the pits. There has to be a better way, and so we just decided that it might be time to find ourselves a cherry pitter.

After doing a bunch of research, it looks like Lehman's Best Cherry Pitter is just that...the best. The company boasts how effective it is at removing pits quickly without bruising or crushing the cherries...we're all for less mess and no wasted fruit! It's actually pretty reasonably priced at around $35 also. Basically, the stainless steel punch rod forces the pit through a gasket into the see-through waste container, then automatically lifts the cherry and drops it into the bowl. We love being able to place several cherries into the feed tray, instead of handling them one at a time. Imagine effectively pitting dozens of cherries in just minutes..what an amazing time saver. Plus, the parts are dishwasher safe...who could ask for more?

There is only one possible catch that we can envision with
Lehman's Best Cherry Pitter. It's unreasonable to expect perfection each and every time, so we can imagine a cherry or two sneaking into our bowl unpitted. And, assuming that each pitted cherry really does come out whole and virtually undamaged as the company claims, it might be easy to miss a particular cherry that still has a pit inside. Not a huge problem when just eating cherries for their simple enjoyment, but definitely a consideration when baking fresh pies and cobblers for dinner guests. So, we'll just have to put out a small disclaimer, and pray that everyone's dental work is up to date.

Regardless,
Lehman's Best Cherry Pitter is worth the risk of an occasional escapee. We'll probably keep a pretty close eye on the hopper to make sure each pit does indeed come out. The best part? This pitter looks safe and easy enough for children to use. Anyone who reads our blog knows we're always looking for ways to put our kids to work...under the guise of fostering independence, of course (sneaky, sneaky)! Ideal for canning, freezing, dehydrating and baking, Lehman's Best Cherry Pitter is a definite "kool" idea for enjoying one of the summer's sweetest treats.

Refreshingly "Kool" Cherry Soup Recipe

Ingredients:
  • 1/4 lemon, peeled and seeded
  • 1 3/4 cups water
  • 1/2 cup sweet red wine
  • 2 cups pitted sweet cherries
  • 1/4 cup sugar
  • 1/4 teaspoon cinnamon
  • 1 1/2 teaspoons cornstarch
Directions:
  1. Chop peeled and seeded lemon into small pieces and blend with water until it forms a smooth pulp.
  2. Put the lemon pulp, cherries, sugar and cinnamon in a medium, heavy-bottomed saucepan. Bring to a boil, then reduce heat and simmer for about 5 minutes.
  3. Dissolve the cornstarch with a little water and add with the red wine to the soup mixture.
  4. Stir constantly over low heat until slightly thickened.
  5. Cool to room temperature in an ice-water bath, then chill for at least 30 minutes in the refrigerator.
  6. Remove cherries with a slotted spoon and blend until coarsely chopped.
  7. Stir the cherries back into the soup mixture and serve.


Bookmark and Share


Subscribe to The Daily Kool by Email

Thursday, June 25, 2009

Today's Kool Idea: Party on the Go Food & Dessert Travel Caddy with 4 Inserts

Every year, the summer is filled with picnics, barbecues and other casual gatherings for The Daily Kool family. Most of these get-togethers are pot-luck events where everyone brings a dish for the guests to share. Needless to say, tables are always filled with a ton deviled eggs, fruit platters, sandwiches and cupcakes galore. So much for shedding those last few (okay, or forty) pounds...sigh. Since most of us tend to bring homemade items as opposed to pre-made trays, we are always looking for convenient travel caddies to hold our food.

Check out today's special value on QVC...the Party on the Go food & dessert travel caddy with 4 inserts. Seems like a pretty "kool" idea, and just what we need to transport our munchies. The set includes four different interchangeable trays...a travel caddy with lid, cupcake/muffin tray, deviled egg tray, 12" round tray, and veggie/chip and dip tray. These inserts are perfect for customizing the carrier for the type of munchies we're bringing to the party. For about $26 (including shipping), the
Party on the Go food & dessert travel caddy is not a bad deal...The Daily Kool would certainly get our money's worth.

We love that the
Party on the Go food & dessert travel caddy has a lid (complete with handle) high enough to protect our goodies...too often, our food gets mushed on top from covering it with tin foil or plastic wrap. We also like that this product comes in five colors to choose from...we are partial to the purple and blue. Achem, excuse us...lilac and sky. The only thing we're not thrilled with is that the caddy can only accommodate one tray at a time. While we understand this for the food itself, it would be so much more convenient if it included some way to store the extra pieces we're not using at the time. At least all the trays nest together for compact storage when not in use, though.

Despite our little pet peeve about where to put the unused inserts, the
Party on the Go food & dessert travel caddy is certainly worth our order. Our plan is to test it out with our basic (and kid-friendly) deviled eggs for the pool party we're going to next week (see recipe below)...good thing our QVC orders tend to arrive pretty quickly. We even picked up a few extra sets as hostess gifts...we're sure our friends will appreciate how easy it is to create an attractive presentation with this product. The smart and stylish Party on the Go food & dessert travel caddy can be used year-round and certainly seems ideal for any type of casual entertainment...a definite "must have"...at least for The Daily Kool family.


Our Basic Deviled Egg Recipe

Ingredients:
  • 12 hard-cooked eggs, peeled and cut lengthwise
  • 1/2 cup mayonnaise (we like Hellmann's)
  • 1 teaspoon dry ground mustard
  • 1 teaspoon white vinegar
  • 1/4 teaspoon salt
  • 1/2 teaspoon ground black (or white) pepper
  • Paprika for garnish
Directions:
  1. Remove the egg yolks and place into a small bowl, mash with a fork.
  2. Add mayonnaise, mustard powder, vinegar, salt and pepper and mix thoroughly.
  3. Fill the empty egg white shells with the mixture and sprinkle lightly with paprika.
  4. Select the deviled egg tray and place it in your Party on the Go food & dessert travel caddy.
  5. Place deviled eggs in the caddy, cover with lid.
  6. Refrigerate up to one day (but at least one hour) before serving.


Bookmark and Share


Subscribe to The Daily Kool by Email

Thursday, June 11, 2009

Today's Kool Idea: Oxo Good Grips Flexible Vegetable Brush

Have you ever noticed how it's the simple things in life that give us the most pleasure? A child's laughter...a morning sunrise...the Oxo Good Grips Flexible Vegetable Brush. Okay, call us crazy (and trust us, many many people have), but we at The Daily Kool absolutely love it when a kitchen gadget gets the job done right. Those of us who own anything by Oxo know that their products usually do. Yep, we admit it...we are big Oxo fans, and have been since we got our first kitchen gadget about ten years ago (yikes, has it been that long?).

The
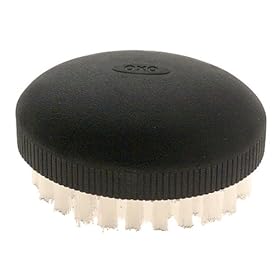
Oxo Good Grips Flexible Vegetable Brush may not be our first kitchen gadget by this top notch company, but it certainly is one of our favorites. In our humble opinion, this vegetable brush is, without a doubt, the best on the market today. Perfect for use on root vegetables such as potatoes, carrots and beets, the Oxo Good Grips Flexible Vegetable Brush's strong and sturdy nylon bristles dislodge dirt deep in the nooks and crannies, regardless of how round, bumpy or odd the surface. Don't be deceived by the term "flexible"...there is nothing flimsy or floppy about this product. The handle is all Oxo Good Grips, ergonomically designed to comfortably fit the palm, while providing an outstanding, non-slip grip with less tension on the hands than a traditional vegetable brush.

We love how the Oxo Good Grips Flexible Vegetable Brush follows the contours of our vegetables for a thorough clean, without damaging the skin...all with surprisingly little effort. Keep in mind that this brush was designed for use with firmer vegetables...we do not recommend using it on the delicate ones, like mushrooms or tomatoes. We do find that the Oxo Good Grips Flexible Vegetable Brush is perfect for removing wax off of our apples and other fruit from the supermarket. Also great for removing the silk from a corn husk...just be careful not to scrub too hard.

It's truly amazing how much thought and effort has gone into the design of such a little gadget...no wonder the Oxo Good Grips line has earned the Tylenol/Arthritis Foundation Design Award and is regarded as on of the icons of Universal Design. The Oxo Good Grips Flexible Vegetable Brush is one of the most frequently used kitchen tool in The Daily Kool household and well worth the $4 price tag. How "kool" is that?


Bookmark and Share


Subscribe to The Daily Kool by Email

Monday, June 8, 2009

Today's Kool Idea: Weber's Way to Grill Cookbook

Summer vacation is finally here, and if you haven't done it already, it's definitely time to break out the barbecue grill. Many childhood memories feature Dad commanding our little charcoal grill, while the rest of us frolicked in the pool. Unfortunately, his skills were pretty much limited to puck...achem, hamburgers and hot dogs. The side dishes more than made up for it, though...particularly Mom's amazing pasta salad. Besides, it's more about the joy of being in the company of family than about the food, especially for the kids...yeah, right!

We were hanging out at our local bookstore a couple of weeks ago and came across the Weber's Way to Grill cookbook. A quick peek inside was all it took to determine that this was a definite "must have" in The Daily Kool household. Jamie Purviance, accomplished chef and teacher, has impressed us with this cookbook in so many ways. Diverse recipes, detailed instruction and beautiful photography are just the beginning. We love how Weber's Way to Grill focuses on culinary details to produce a winning meal every time, instead of settling for the mediocrity (sorry, Dad) that comes with just "winging" it. Clearly a lot of thought and effort went into the organization of this book.
Weber's Way to Grill is chock-full of tips to maximize the flavor of your beef, chicken, pork, seafood, vegetables and even fruit, along with tempting side dishes to complement every recipe. Plus, there is an entire section on grilling basics that gives equal coverage to wood, charcoal and gas techniques. The resource section complete with rubs, marinades and sauces are worth the price of this amazing cookbook alone...not to mention the grilling guides that help to ensure cooking perfection...yes, even for Dad.

Weber's Way to Grill is one of the most comprehensive cookbooks on the market today....an all-in-one master class in every way. It is definitely an indispensable asset for novice and expert grillers alike. Dad is getting this one from the kids for Father's Day...a perfect gift, especially since we're planning on barbecuing dinner that night anyway. Okay, so the gift might be more for us than our father. Here's hoping we can get a medium rare steak out of the deal!

Check out this terrific recipe from Weber's Way to Grill. And, if all else fails, we've also included Mom's famous pasta salad. Enjoy!


Garlic-Crusted Rib-Eye Steaks
Paste Ingredients
4 large garlic cloves
1 tablespoon kosher salt
1/4 cup finely chopped fresh Italian parsley
1/4 cup extra-virgin olive oil
2 teaspoons balsamic vinegar
1 teaspoon freshly ground black pepper

4 bone-in rib-eye steaks, 10 to 12 ounces each and about 1 inch thick, trimmed of excess fat

Directions:
  1. On a cutting board, finely chop the garlic, then sprinkle with the salt. Use the side of a knife to smash the garlic into a paste. Put the garlic paste into a small bowl and add the remaining paste ingredients.
  2. Smear the paste evenly over both sides of each steak. Let the steaks stand at room temperature for 20 to 30 minutes before grilling.
  3. Prepare your grill for direct cooking over high heat (450-550 degrees F), and brush the cooking grates clean.
  4. Grill the steaks over direct high heat, with the lid closed as much as possible, until cooked to desired doneness. For medium rare, this will be about 6-8 minutes, turning once. Remove from grill and let rest for a few minutes before serving.

A Different Kind of Pasta Salad
Ingredients
1 lb box tri-colored rotini noodles
1 small jar sliced olives
1 small red pepper, chopped
1 small green pepper, chopped
1/2 cup mayo
1/3 cup red wine vinegar
1/3 cup vegetable oil
salt and pepper to taste

Directions
  1. Cook noodles until al-dente. Drain well.
  2. Combine all ingredients. Refrigerate at least 2 hours or until ready to serve.


Bookmark and Share


Subscribe to The Daily Kool by Email

Friday, May 8, 2009

Today's Kool Idea: EatSmart Precision Pro Digital Kitchen Scale

Well, judging by the weather, summer is definitely just around the corner here at The Daily Kool, and boy, are we in big trouble. Bathing suit season is almost here, and we have totally been neglecting our healthier eating habits these past few months...yikes! Time to get back on track and start watching what we eat. Thank goodness we have The Biggest Loser finale coming next Tuesday for inspiration. Those contestants are amazing...an absolute inspiration to everyday people like us who want to improve our health and increase longevity. And, while The Biggest Loser contestants have had many tools at their disposal to help them shed those extra pounds, one of the most important has undoubtedly been an old standard...a kitchen scale.

Believe it or not, there are several features you should consider when purchasing a kitchen scale. Capacity, precision and price are our top three. There are so many choices for a kitchen scale on the market today...The Daily Kool believes that no one does it better than EatSmart. For our home, the EatSmart Precision Pro digital kitchen scale is hands-down one of the best investments we've ever made...and it definitely gets more of a workout than we ever do (unfortunately...sigh).

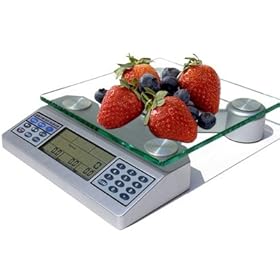
With an 11lb capacity, amazing accuracy and approximate $25 price tag, the
EatSmart Precision Pro digital kitchen scale is a terrific value. It is compact, yet the extra large LCD display makes it easy to read...plus, it's attractive enough to keep on our kitchen counter. We love the tare (zero) feature which allows us to automatically subtract the weight of a plate or container holding our food. Even better, it uses standard AAA batteries (as opposed to the more expensive CR2032 button ones) which we always have lying around the house. Add the four measurement mode (grams, ounces, kilograms and pounds) and a stable platform with five rubber feet to eliminate sliding, the EatSmart Precision Pro is a simple, yet effective digital scale for any kitchen. The only problem we've ever had with this product is when we want to measure ingredients in an extra large bowl or plate. They will partially cover the display, making it a little difficult to read...this is such a minor issue, though, it's hardly worth mentioning (but we will anyway, of course).

Not only is the
EatSmart Precision Pro digital kitchen scale invaluable as a tool for measuring food for weight management, but it is an absolute must have for any home baker. Precise measurements are the difference between success and failure in baking. Dry ingredients such as sugar and flour should always be measured with a kitchen scale, instead of standard measuring cups. There are too many variables (air pockets, compression, etc) that can intefer with pastry perfection...regardless of how much flour you get into your scoop, you can ensure better accuracy with a quality digital kitchen scale like the EatSmart Precision Pro.

Though the EatSmart Precision Pro digital kitchen scale is perfect for our household needs, the company has taken technology one giant step further with their latest innovation. In addition to traditional food measurement, the EatSmart Digital Nutrition scale also analyzes the nutritional content of ANY food by portion size, and is the only scale on the market that allows you to calculate nutrients for any food with a USDA Nutrition Facts label. For those of us who need a more comprehensive educational and behavioral modification tool, the EatSmart Digital Nutrition scale is definitely worth checking out.

Healthy eating choices, regular exercise and controlled consumption are the keys to proper weight loss and management. We never have to guess about portion sizes with our EatSmart Precision Pro digital kitchen scale. Putting our food on this scale today will help keep us off The Biggest Loser one in the future. Summertime, here we come!


Bookmark and Share


Subscribe to The Daily Kool by Email
Monday, May 4, 2009

Today's Kool Idea: Caramel Apples for National Teacher Day

Tomorrow is National Teacher Day, and is part of a week-long celebration honoring our teachers. It is our children's opportunity to thank the special teachers in their lives for their hard work and dedication throughout the school year. Few professionals impact our lives as teachers do...each of us has undoubtedly had at least one teacher who profoundly affected and inspired us as children (and adults). Though we believe that teachers should be recognized every day, National Teacher Day is indeed an ideal time to join together with other communities and acknowledge how much we value and respect their contributions to our children's future.

National Teacher Day is met with much anticipation in The Daily Kool household. Our kids aren't satisfied unless they give presents to all of their teachers...homemade, of course. So, every year, we grab a bunch of extra-large Granny Smiths and make a perennial favorite...caramel apples. One of these delectable creations in a gift bag complete with ribbon and a handmade tag makes a perfect token for National Teacher Day. Trite? Perhaps, but seriously...these are incredibly well received by every teacher our kids have given them to. Plus, making caramel apples is a great way to bond with our children in the kitchen.

Caramel apples can be a fickle business...they are definitely not for the faint of heart. The biggest obstacle that most of us face is keeping that $@%&! caramel from sliding off the apple. Trust us...we empathize. After all, we have certainly had our share of unsuccessful caramel apple attempts. That's why The Daily Kool is here to help you create this delicious treat with minimal glitches and optimum success. Be aware, though...they won't necessarily be picture perfect...if you're unwilling to settle for anything less and are willing to pay a premium, feel free to leave it to the professionals at your local gourmet chocolate establishment, Mrs. Prindables or Amy's (award winning and our personal favorite). Don't worry...we won't judge.

The key to preventing the caramel slide is in the preparation of your apple. We use room-temperature apples only, washed thoroughly and then dried completely. This is extremely important...if your apple is not dry, it will not hold your caramel. Another trick is to make sure that there is no waxy residue on your apple. A quick scrub with a veggie brush has always worked for us, but you can always dip the apple in boiling water first...be careful to do this very quickly, though...otherwise it will be disastrous.

Once you get over the caramel hurdle, it is really incredibly easy to create scrumptious caramel apples. We have put the recipe we use below...don't expect homemade caramel from The Daily Kool here, though...remember, we are doing this with the kids, so we stick to the basics...and Kraft wrapped caramels, of course. Making caramel apples is a fun and rewarding activity to do with the kids. It is just a small way of expressing our gratitude for the difference teachers make in our lives every day. So, please take a moment to thank your teachers on National Teacher Day for bringing passion and a commitment to educating, inspiring and empowering our children. They deserve it!


Slow Cooker Caramel Apples

Ingredients:
  • 2 packages (14oz each) Kraft wrapped caramels
  • 1/4 cup water (or milk)
  • 6-8 medium (or 3-4 large) apples (we like Granny Smith, but McIntosh, Gala, or Fuji work fine also)
  • sticks for apples (we prefer craft picks with a pointed edge for better insertion)
Directions:
  1. Prepare apples as described above. Insert pick (or stick) into stem end of each apple and set aside.
  2. In slow cooker, combine caramels and water. Cover and cook on high for 1 to 1-1/2 hours, or until melted, stirring frequently to prevent scorching. When melted, switch setting to LOW.
  3. Line a baking pan with parchment paper...butter or spray with Pam.
  4. Dip apple into hot caramel, turning to coat entire surface, spooning caramel over apples if necessary...please supervise your children carefully if they are helping with this step...the crock pot will be hot and caramel can scald.
  5. Holding the apple above the pot, allow excess caramel to drip off, then scrape bottoms of apples and place on prepared pan.
  6. Put the pan of coated apples in the refrigerator at least one hour to set thoroughly.
Note: Though we prefer to use a slow cooker for our caramel apples, you can also get great results with a large saucepan on medium low.

Another Note: We sometimes get more creative with this recipe by rolling the bottom of each freshly dipped apple (before refrigeration) into one of the following: crushed Oreo cookies, chopped nuts, sprinkles, mini M&Ms, etc. We wear latex-type gloves for this step to help firmly press the toppings. We have also drizzled dipped apples with melted milk, white and/or dark chocolate. The possibilities are endless!


Bookmark and Share


Subscribe to The Daily Kool by Email

Tuesday, April 7, 2009

Today's Kool Idea: Passover Matza 101 Cookbook

Okay, by now our fans should all be aware of The Daily Kool's obsession with food. If not, you haven't been reading our stuff! Call us crazy, but we particularly like the challenge of cooking for the Passover holiday. It's not as easy as you would expect, especially since many traditional ingredients (bread, flour, legumes, etc.) in our recipes are forbidden during Passover. After all, how creative can we really get with matzoh?

That's just the question neighbors Jenny Kdoshim and Debbie Bevans asked when they wrote Matza 101. This innovative cookbook takes an original approach to Passover recipes, with matzoh as the main ingredient. We like that this hardcover book has a spiral binding, making it easy to stay on the right page. We also appreciate how detailed the directions are, making each recipe virtually foolproof. In Matza 101, the authors demonstrate an simple process which enables the home cook to manipulate matzoh, resulting in endless possibilities in the kitchen. The procedure is to basically dampen the matzoh until it reaches an al-dente, lasagna noodle-type texture. Please be aware that it may take a little practice to perfect, but when you do...watch out! Can you imagine the possiblities now?

Passover is a particularly difficult holiday for many children with finicky pallettes. Matza 101 has truly guided us in creating delectable dishes that even our kids love. A particular favorite were the Matza Mini Franks...simple, but oh so yummy! Another winner in our household is the recipe for Matza Veggie Calzones. We have sampled many recipes from this amazing cookbook. This year, we are going to try our hand at Chicken Pot Pie. From baklava and cannolies to knishes and gefilte fish enchiladas, Matza 101 has given our family a smorgasbord of delicious recipes that have to be tasted to be believed. We have given you a recipe to try out, courtesy of Matza 101...the only modification that we have made is to use jarred pasta sauce as a time-saver. Though it doesn't compare to homemade, it does simplify the recipe for the beginning Passover cook. Enjoy, and have a wonderful holiday!

Matza Cheese Lasagna

Ingredients:
1-2 jars of pasta sauce (3-4 cups, depending on preference)
6 sheets of matzoh
2 cups of cottage cheese
2 cups of ricotta cheese
2 1/2 cups shredded mozzarella cheese
1 cup grated parmesan cheese
1 egg, beaten
pinch of nutmeg
1/2 to 1 teaspoon black pepper (or to taste)
1/4 cup chopped fresh italian parsley

Directions:
  1. Preheat oven to 350 degrees F.
  2. Set aside 1/2 cup EACH of the mozzarella cheese and parmesan cheese.
  3. Mix all of the other above ingredients in a bowl, except the matzoh and sauce.
  4. Grease a lasagna pan (with a little oil or cooking spray) and place some of the pasta sauce in the bottom.
  5. Cover the bottom of the pan with two sheets of matzoh side by side.
  6. Top the matzoh with 1/3 cup ofthe cheese mixture, and top with about 1 cup of sauce.
  7. Repeat the layering and end with the sauce.
  8. Top with the reserved mozzarella and parmesan cheeses.
  9. Place in oven and bake for about 45 minutes or until melted and bubbly.


Bookmark and Share


Subscribe to The Daily Kool by Email

Friday, April 3, 2009

Today's Kool Idea: Popcorn Egg Decorating Kit by The Popcorn Factory

What better way to end our "kool" ideas for Easter week than with our all-time favorite snack...popcorn! We at The Daily Kool like to think of ourselves as popcorn aficionados, if only because we eat so darn much of it! Yep, popcorn is an obsession in our family for adults and children alike. So, we were really excited to see this great idea for a popcorn egg decorating kit from The Popcorn Factory.

These popcorn eggs look so yummy, we honestly question whether we will be able to hold off long enough to decorate them. The delectable popcorn egg decorating kit comes with a candy writer tube, an assortment of candy eyes, flavored tootsie rolls, mini marshmallows, red licorice, caramel corn, licorice bridge mix, smarties, mini graham crackers, an instruction sheet and 12 popcorn eggs. Are you getting hungry yet? Because we sure are!

This is a terrific project for the entire family. It got us thinking, though. Being the cooking-obsessed fools we are at The Daily Kool, we had to find out if we could also do this idea on our own. So, we borrowed a fabulous recipe from the famous Paula Dean for popcorn balls and modified the shape to a more "egg-like" form. Delicious! It was actually easier than we thought, with a few slight considerations...we've included them in the recipe below. Whether you purchase the popcorn egg decorating kit from The Popcorn Factory or try your hand at making it on your own, these tasty morsels will definitely sweeten up your Easter holiday. Enjoy!

Ingredients
2 cups sugar
1 1/3 cups water
1/2 cup light corn syrup
1 teaspoon white vinegar
1/2 teaspoon salt
1 teaspoon vanilla extract
18 cups plain popped corn (not microwaved...use either pre-popped corn or make your own)
Candy of your choice and icing tubes to use for decorating


Directions
  1. Place popped corn in a large greased glass bowl (we sprayed with Pam)
  2. In a medium saucepan, combine sugar, water, syrup, vinegar and salt. Cook over high heat, stiring constantly with a wooden spoon until mixture reaches 255 degrees F (hard-ball stage) on a candy thermometer.
  3. Stir in vanilla.
  4. Pour SLOWLY over popped corn, tossing gently with your wooden spoon. Again, do this slowly or you will melt the popcorn.
  5. Let the mixture get cool enough to handle.
  6. With lightly greased hands (we used oil), press popcorn into an egg-like shape. Make sure they are large enough to decorate!
  7. Should make 10-12 nice sized popcorn eggs.


Bookmark and Share


Subscribe to The Daily Kool by Email
Wednesday, March 25, 2009

Today's Kool Idea: Presto Cool Touch Electric Griddle

The Daily Kool is always looking for quirky snippets of information to help inspire us with "kool" ideas. According to About.com, today is the anniversary of the first pancake ever made in New York City (1882). Our family loves these gluttonous little flippers...they are an easy, inexpensive and delicious breakfast (or lunch...or dinner). Sunday is the official pancake day in our household..there is just something about them that inspire a family to sit and eat together. Unfortunately, as our family (okay, and waistlines) continues to grow, one frying pan simply is not big enough to keep up with pancake demand. And really...who wants to clean more than one pan on a Sunday morning...or ever for that matter?

The Presto Cool Touch Electric Griddle saved the day for us. We do have to confess that it was not our first griddle purchase. We started out with one of those large griddles that go across two burners with disastrous results..we just couldn't get it to cook evenly at all on our glass stovetop. We found the Presto Cool Touch Electric Griddle for around $50...perhaps a little expensive, but such a great investment in our household! For the cost of about two family trips to the local IHOP, we can now finally all sit down and enjoy a pancake breakfast together at home. The Daily Kool chose the largest (it's really huge!) Presto Cool Touch Electric Griddle (24") for our family, but you can choose a size (and price) that works best for you. Since we cheerfully admit to our ineptness at putting things together, we like that there was no assembly involved with this product. Since we like to use butter to add flavor when making pancakes, we have never truly tested the non-stick finish. What we can tell you is that the Presto Cool Touch Electric Griddle is convenient, completely immersible for cleaning (and dishwasher safe) and a real time-saver. The temperature gauge is pretty accurate...there are some slightly cooler spots, but we just move the pancakes around while cooking to ensure evenness. We can't quite figure out why we still get a black residue on our hands when touching the bottom, though...okay, maybe we're being petty here, but hey...we never said we weren't shallow.

An electric griddle is a must have kitchen item for any family of 4 or more. The Presto Cool Touch Electric Griddle was a terrific choice for The Daily Kool household. Sure, it works great with pancakes, but it's also fabulous for grilled cheese, french toast, eggs, etc. It also allows us to have plenty of room to occasionally get creative and use our pancake molds for the kids. Our Presto Cool Touch Electric Griddle even inspired us to search for some terrific pancake recipes. Forever loyalists to Alton Brown from The Food Network, we have given you his yummy instant pancake mix recipe. Enjoy!

Ingredients
6 cups all purpose flour
1 1/2 teaspoons baking soda
3 teaspoons baking powder
1 tablespoon kosher salt
2 tablespoons sugar

Directions:
Combine all of the ingredients in a sealed container (check out our Lock and Lock post). Shake well to mix...use within 3 months.


Ingredients for "Instant" Pancakes:
2 eggs, separated
2 cups buttermilk
4 tablespoons melted butter
2 cups "instant pancake mix", recipe above
butter, for greasing pan


Directions:
  1. Heat your Presto Cool Touch Electric Griddle to 350 degrees.
  2. Whisk together the egg whites and buttermilk in a small bowl. In another bowl, whisk the egg yolks with the melted butter.
  3. Whisk the buttermilk mixture with the egg yolk mixture in a large bowl until thoroughly combined.
  4. Pour liquid ingredients on top of the pancake mix (in another bowl). Mix the batter just enough to combine...don't try to work out all the lumps.
  5. Lightly butter the griddle, and wipe off immediately with a paper towel.
  6. Ladle the pancake batter onto the griddle. When bubbles begin to set around the edges and the griddle-side of the cake is golden, gently flip the pancakes. Cook for 2-3 minutes until pancake is set. Serve immediately.


Bookmark and Share


Subscribe to The Daily Kool by Email


Friday, March 13, 2009

Today's Kool Idea: Herb and Spice Grinders by McCormick


Bookmark and Share


Have we mentioned how much we love food at The Daily Kool? Okay, so maybe our waistlines are expanding along with our cooking repertoire, but who can resist the glowing feeling when a guest smacks his lips and moans in ecstasy from a meal freshly prepared by yours truly? We found that if we are creative and properly use spices to enhance our food, we can actually satisfy taste buds with healther choices. Unfortunately, although we at The Daily Kool love big bold flavors, we do have to think about our spouses and children who are just not as adventurous as we are. So, we tend to save our more exotic temptations for company, and try to stick to the basics for the everyday family dinner table. The trick is to figure out how to get the best of both worlds without running a cafeteria in our homes.

About a month ago, we were shopping at our local supermarket and found these herb and spice grinders by McCormick on sale. Always looking for a bargain, we took advantage of the buy-one-get-one-free opportunity and purchased a bunch of them to try. What was the attraction, you ask? According to our research, freshly ground spices tend to have more fullness and potency than the typical pre-ground spice. The flavor and aroma of ground spices evaporates over time, due to the dissipation of their volatile oils...a well-sealed container will have little or no effect on this process. We wanted to see if the herb and spice grinders by McCormick would give us that robust flavor we were looking for.

Since we already had sea salt and black pepper grinders at home, we passed on those options...we must point, however out that we believe no kitchen should be without these two staples. However, for our purposes, we were more interested in the seasoning blends. So, we purchased the Italian Herb Seasoning Grinder, The Steakhouse Seasoning Grinder and the Garlic Pepper Seasoning Grinder. Since we had one more free product to try, we selected the Cinnamon Grinder, just to check it out.


The Italian Herb Seasoning Grinder was a great addition to our pasta dishes at home...the red pepper made it a little too spicy for our children, so we omitted it during the cooking process. We tried it on several of our homemade dishes, including Eggplant Parmesan, Penne Alfredo, and our simple Spaghetti with Marinara Sauce...all with equally delicious results. We at The Daily Kool firmly believe that no Italian meal is complete without fresh, crusty bread dipped in a good quality, extra-virgin olive oil, so we tried the Classic Italian Bread Dip featured below, courtesy of the McCormick website...delicious!


The Steakhouse Seasoning Grinder was...okay. We tried it twice, once on steak night and the other on hamburger night. We found that we much preferred our own beef spice blend concoction (paprika, onion powder, garlic powder, pepper, etc.) to the Steakhouse Seasoning Grinder. We would have to say that McCormick kind of missed the mark here...the flavors just did not stand out enough to make an impression.


Same goes for the Cinnamon Grinder, unfortunately. While it was perfectly adequate for homemade french toast and oatmeal for the kids, there just wasn't enough potency for our tastes. We have heard an interesting rumor that Vietnamese cinnamon is the best in the world, so perhaps we will try that out for another blog post. In the meantime, we will probably stick with pre-ground cinnamon options.


The Garlic Pepper Seasoning Grinder was a definite winner in our household. We tried it on pan-seared chicken with truly yummy results. We provided you with this recipe below as well. We also loved the Garlic Pepper Seasoning Grinder with our baked potatoes. This was a favorite even for the kids. We found that it added great flavor to our omelets, fish and all barbecued poultry.


Overall, the herb and spice grinders by McCormick are a great addition to any kitchen. If you don't have black pepper or sea salt grinders, we definitely recommend you trying theirs. Also, check out our favorites, the Italian Herb Seasoning Grinder and the Garlic Pepper Seasoning Grinder. Here are a couple of recipes to get you started...Enjoy!

Classic Italian Bread Dip

Ingredients:
5 twists of McCormick Italian Herb Seasoning Grinder (or to taste)
2 shakes of grated Parmesan cheese
1-2 twists of McCormick Sea Salt Grinder (or to taste, again)
2 tablespoons extra-virgin olive oil

1. Place spices and Parmesan cheese in a small bowl.
2. Add extra-virgin olive oil on top, swirl gently to combine.
3. Dip away with your delicious homemade (okay, or store-bought) crusty bread.


Pan-Seared Chicken

Ingredients:
2 tablespoons of extra-virgin olive oil
4-6 boneless, skinless chicken breasts
McCormick Garlic Pepper Seasoning Grinder to taste

1. Heat up olive oil on medium until just smoking.
2. If you have The Blade Machine by Deni (previous kool idea), tenderize your chicken breasts.
3. Using a mallet (or a can of vegetables in a pinch), gently pound the chicken breasts between two pieces of wax paper or saran wrap until about 1/4 inch thick.
4. Season one side of the chicken with the McCormick Garlic Pepper Seasoning Grinder and place that side down in the pan. Be careful not to overlap your chicken.
5. When all the chicken is in the pan, season the other side. Saute the chicken for about 2-4 minutes on each side and serve immediately.


Subscribe to The Daily Kool by Email

Thursday, March 5, 2009

Today's Kool Idea: Victorinox Cutlery UltraShield Cut Resistant Glove


Bookmark and Share
Last week, The Daily Kool featured the mandolin as a terrific kitchen product. Our only problem is the "safety handle" that it comes with...we have yet to find one that holds the food as well as our hand does. However, mandolin blades are sharp, and it is much too easy to slice off the tip of your finger if you're not careful...unfortunately, we speak from experience. Ouch!

We might have mentioned our addiction to cooking in a past blog (or seven)...this goes hand in hand with our obsession with the Food Network, and the show, Good Eats. Alton Brown is one of our all-time favorite hosts, and is responsible for many wonderful ideas that we implement in our kitchen. It was Alton Brown who introduced us to the idea of wearing a cut-resistant glove when using our mandolin and other sharp kitchen items. Our curiosity was peaked indeed.

After some research, we opted for the Victorinox Cutlery UltraShield Cut Resistant Glove for several reasons. Manufactured with superior materials for outstanding protection and slip resistance, the Victorinox Cutlery UltraShield Cut Resistant Glove is much more comfortable than we expected. We had complete mobility, and one glove was able to fit either the left or right hand. Because we were using it in the kitchen for food preparation, the FDA and USDA approval was of paramount importance to us.

We recommend that you use the Victorinox Cutlery UltraShield Cut Resistant Glove for all your food preparation requiring sharp tools. Keep in mind that you still have to avoid the sharp edges just like you would if you weren't wearing it. The benefit comes in the case of accidental contact with a sharp edge. It may still damage the glove, just not your hand. We have to be honest...although we use it frequently, thank goodness we haven't put ourselves in a situation to truly test the durability of the Victorinox Cutlery UltraShield Cut Resistant Glove. It is more one of those "better safe than sorry items" in our kitchen, yet an absolute must-have (in our opinion) for any home cook. We do, however, have complete confidence that this "kool" product will help keep all our fingers in tact in the event of an accident.

Onions are particularly challenging to slice with a mandolin's safety handle. However, thinly sliced onions, especially in soup are absolutely delicious! Take this opportunity to try out one of our favorite "last minute" soup recipes:

Ingredients:
  • 1/4 cup olive oil
  • 1 large Spanish onion, thinly sliced with your mandolin (yields approx. 2-1/2 cups)
  • 1 can Hunts Sweet Onion chopped tomatoes
  • 4 cups tomato juice (we use Campbell's...do not use V-8)
  • 2 cups water
  • 1-1/2 teaspoons celery salt
  • 1-1/2 tablespoons diced fresh basil (or 1-1/2 teaspoons dried)
  • 3 teaspoons diced fresh oregano (or 1-1/4 teaspoons dried)

  1. In a large soup pan on medium heat, simmer and stir onions until they turn transparent, but not brown.
  2. When onions are transparent, add celery salt, basil and oregano. Stir to coat onions.
  3. Add tomato juice and water.
  4. Heat and stir the mixture occasionally for 20-25 minutes on medium heat.
  5. Add canned tomatoes, partially cover and simmer for 15-20 minutes longer.
This soup is delicious with shredded Cheddar (or Mexican blend) cheese. Also try in a bread bowl with a dollop of sour cream. The possibilities are endless, so be creative and enjoy!